May 16, 2023

Weekend Getaway in Kristiansund Norway

I am taking a break from crafting so I can finish my backlogs. This has been on my draft for four years already and for some reason, nalilimutan ko tapusin. Nevertheless, let me try to refresh my memory. 

Four years ago, my mom and aunt were planning for our Kristiansund trip and they already set a date for our weekend trip. The first week of May came and it’s been snowing and raining so they canceled our trip. Two weeks after, the weather was still not good but rain or shine, we pushed our trip because we were running out of time. We only had a few weeks left for our summer vacation in Norway. 

We were not able to leave early because my mom was still working so after her working hours we immediately went to the Ferry Terminal so we won’t miss the boat. 


Scandic Kristiansund 

We traveled for almost 5 hours but it was not a boring trip because of the beautiful scenery. We arrived at Scandic Kristiansund in the evening but since we are in Norway, the sunset is late. This hotel is located in the heart of the town so it is near the tourist spots, harbor view, and airport. 


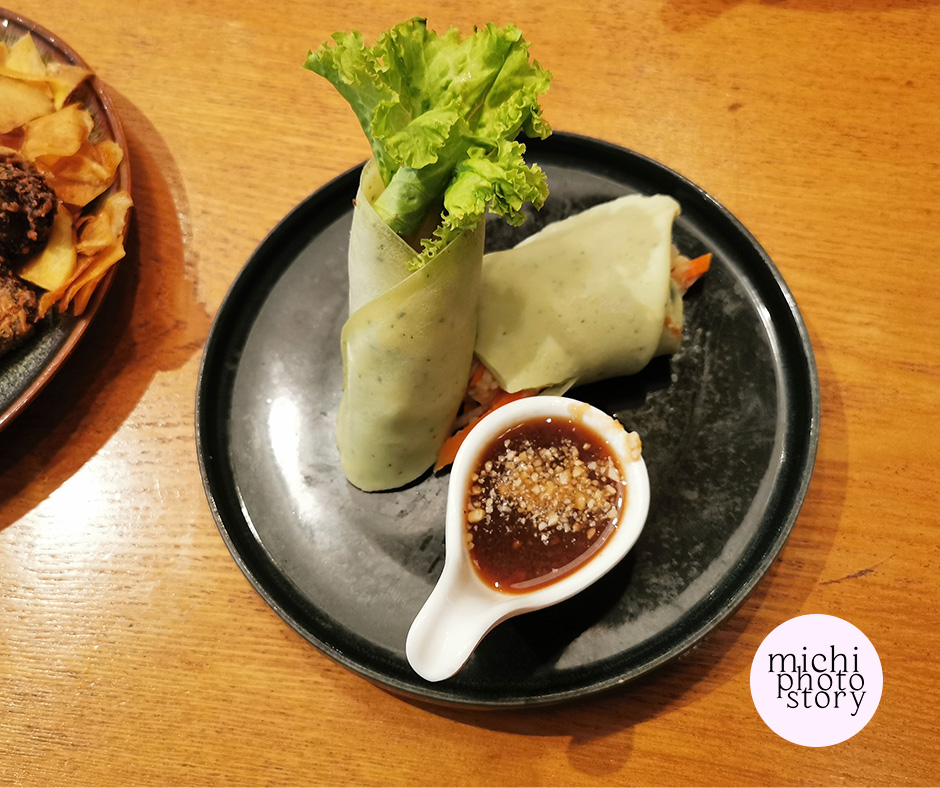
Dinner at Bella Napoli 

After check-in, we went out for dinner and we were able to see some tourist spots like Sundbåten, Herring Boy and Klipsish Woman


We ate dinner at Bella Napoli. It was already late and the weather is still not good so we went straight to the hotel to rest. 


Walking Tour at Kristiansund 

The following day, after breakfast we had a quick walking tour at Kristiansund. It just so happened that we saw a flyer in the lobby so we decided to explore the city before our check-out. We were able to visit the following places. 


Byfossen 1742-1992  
Kongesteinen  
Kirkelandet Kirke  
Varden Utkikstårn  


Atlantic Ocean Tunnel and Atlantic Ocean Road 

And of course, the main reason for this trip is to see the Atlantic Ocean Road, I only see this in pictures so I am really glad that I finally visited the place. On our way to “Atlanterhavsvegen” we passed the Atlanterhavstunneien or Atlantic Ocean Tunnel. It is an undersea tunnel that connects Kristinasund Municipality to Averøy Municipality. 


The Atlantic Ocean Tunnel is one of the deepest undersea tunnels in the world with 250 meters in depth and 5,727 meters long that runs beneath the Bremsnesfjorden


The Atlantic Ocean Road is an 8.3-kilometer road that was built on several small islands and skerries. It connects Kristiansund and Molde. This road is considered a National Tourist Route and cultural heritage site. If you watched James Bond's “No Time to Die” movie then you are familiar with this road.

May 12, 2023

Brunch at Kuya J Restaurant

Since March, my husband has been craving for halo-halo so sometimes, he will just go out just to buy halo-halo. We are not fond of food deliveries kasi kaya my husband will visit mall pa talaga. And sa ilang beses niyang labas, hindi siya nakakabili ng halo-halo sa Kuya J, lagi na lang nauubusan so he will just buy halo-halo at different restaurants. 

Last week, we went to the Festival Mall for groceries and to buy a new phone for my son. After doing our errands, we went to Kuya J Restaurant, it was just past 10AM so super aga namin, And before we entered the restaurant, my husband asked if available yung halo-halo kasi kung hindi sa iba kami kakain. The staff said yes, so we went inside and we were the first diners. 


We are not really hungry kasi nga wala pa lunch time but my husband wanted to eat halo-halo kasi. We tried all their halo-halo before so we ordered the Halo-Halo Espesyal and Ube Halo-Halo, PHP89 for solo, PHP129 yata for regular size. 


We also ordered Tadyang Na Baka PHP699, Lumpia Presko PHP119 and Rice Platter PHP150. The taste of the food is just okay but we enjoyed our halo-halo, finally, the cravings were satisfied. In fairness, mabilis service dito, naserve agad yung food. 


May 11, 2023

3D Camper Van Paper Craft

“By day, I’m a crafter. By night, I’m a tired crafter.” hehehe! Since last month my life revolves to crafting because I’ve been joining Bee Happy Crafts Weeklies. Crafting makes me happy but I cannot deny that it is also tiring especially if I need to repeat the process from the start, if I can’t put the pieces together and lastly, cleaning up my mess after doing my project. 

Mother’s Day is approaching but in Norway, it is already over. For this week challenge, we need to share craft project for all the moms in our lives. My mom likes flowers but I already did that last year, you can check this post. So I decided to fulfill one of her dreams, I can’t buy her a camper van or RV but I can make one for her. 

I found this 3D Camper Van template on Pinterest so I check the blog and vlog and it looks simple and easy but I spoke too soon because it took me three days to finish this camper van and I almost scrap the project, I had a difficult time in putting the roof, for some reasons, the glue is not working and I even used my glue gun but it didn’t help. I don’t know why but I’m blaming the glossy cake box that I’ve used. I repurposed the cake box so this project would be sturdy. 

Thanks to my husband because he suggested “double-sided tape” and because of that, I was able to finish my project. I added a card too "Home is where you park"


May 09, 2023

Pop-Up Cube Gift Box

I’ve submitted 3 entries for Washi Tape and Red and Yellow Theme Weeklies so I decided to finish my Pop-Up Cube Gift Box so that I also have three entries. After doing my Suitcase Explosion Box and Crafting Wishlist Explosion Box, I wanted to learn something new so I searched on Pinterest and I found “How to Make Pop-Up Cube Gift Box” blog post. I realized that the templates for my explosion boxes are all designed by Emily Minor. 

I liked her SVG file because it is so easy to follow and everything can be cut using my Cricut Maker. Although it took me a few days to finish this project because I did one step per day like cutting, printing the design, and assembling the box. 

I use my die cut to design the top cover of the box. Even though this is just a small pop-up cube gift box. I enjoyed making it and I’m happy that I learned something new. You can check the video on my Instagram.


May 08, 2023

Mother’s Day Card with Cricut

I mentioned in my previous post about my “Project Half Done” so I’m trying my best to finish those projects; one of them is “Mother’s Day Card with Cricut”, which is one of the online classes in Creative Fabrica. 

When I checked the file, it has a lot of layers and colors so I decided to cut all the files using two white cardstock. I did not change the size so it was really a challenge to assemble. I used washi tape at the back and for the rest, I just use the color markers for the flowers and leaves. And because the file is too small, I did not follow the front layer of the basket, I just embossed it. 


I made a mistake in coloring and pasting so the white flowers are not in the correct position but I still continued it. The end result is not perfect but I am happy that I finished it and it made me realize that I can do some craft projects even though I don’t use colored cardstock. If I will redo this project, I will increase the size. 

May 04, 2023

Apple Gift Card Holder

I am "Working on my Ph.D. in crafting meaning Project Half Done". Hehehe! This funny quote is so true because I started doing a project yesterday and I’m about to continue it today but all of a sudden, I stopped. Then I started another project and while assembling it, I stopped again. I kept all my unfinished projects and started a new one again. 

I just remembered that tomorrow is 5.5 Sale so it means it is shop o’clock again; an idea just popped into my head so I made a gift card holder and I added a shopping tote bag to match the theme. Fortunately, I was able to finish my Apple Gift Card Holder and Tote Bag, this is part of my entry for Bee Happy Crafts: Red and Yellow theme. 


The apple gift card holder has 7 layers and I like this because it is so easy to make and it can stand on its own. 


But if you want to save on papers, here are another Apple Gift Card Holders with 2 layers only.


May 03, 2023

Crafting Wishlist Explosion Box

This year we have a lot of long weekends but we just stayed home, by choice. I already set my mind that we won’t have any travel this year, in short naka-mindset na. And because I am not traveling, I can focus my time on crafting so since last month, I’ve been joining Bee Happy Crafts Weeklies. So far, I’ve made a total of 8 projects and the deadline is not yet over so let's see if I can still do one more project before the due date. 

Anyway, last long weekend, we did not go out so I just spent my time doing crafts. I made Purse Gift Card Holder and Woman’s Gift Tag and yesterday, I finished my Crafting Wishlist Explosion Box. I am exploring how to make an explosion box so this time, 3 layers na. 

If there are Wedding Gift Registry or Baby Gift Registry, I’ve made my own version which is the Bee Happy Crafts Gift Registry so my box includes some of the crafting machines, tools, and supplies that I’ve been dreaming of. The product ranges from budget-friendly to expensive one. This explosion gift box is very useful especially to my husband because hindi na siya mahihirapan pa mag-isip. He no longer needs to ask me what I want to receive, nasa box na. Hehehe!


On my first day, I cut the explosion gift box template and I also print and cut the photos of my wishlist. The following day, I made the Crafting Gnomes, both male and female, the Square Box with Sliding Lid and assembled the gift box. 


I’m glad that I can already make an explosion box, thanks to my cutting machine and template, hindi na mahirap magcut. You can check the video on my Instagram. 

April 28, 2023

Suitcase Explosion Box

I already created projects for "washi tape" and "red and yellow theme" but I had second thoughts about the next theme which is “Explosion Box”. I have never tried making it because I find it complicated and after seeing the explosion box entries, mas lalo ko nagdalawang isip. Hehehe!

But like the quote said “Never be afraid to try something new, because life gets boring when you stay within the limits of what you already know” So I pushed myself to create an explosion box even though it is nothing compared to my fellow crafters. 


The instruction is to create an explosion box for Bee Happy Crafts, one entry already created an anniversary theme so I decided to create something that would represent what is Bee Happy Crafts store to me. 

Looking back, I started my crafting adventure when my husband gifted me a Cricut Maker, he bought my cutting machine at Bee Happy Craft during the pandemic. Since then, I discovered online shopping and I started investing in my hobby. Even though I am an occasional crafter, I started buying craft machines, tools, and supplies. 

And Bee Happy Craft is a big part of my crafting journey, I am thankful to this store for bringing global brands to the Philippines and making them accessible to Filipino crafters like me. It has its own physical store, online store, meron din sa Shopee and Lazada so even though I live outside Metro Manila, I can place my order. 

I feel happy because yung nakikita ko sa Pinterest, slowly nadidiscover ko na kung paano gawin. How I wish, I discovered Bee Happy Craft before, so I can make more DIY and Craft projects during my son’s toddler years. 

Anyway, going back to my project, since this is about store and delivery, I made a suitcase explosion box so it is like a happy mail. I cut the template using my Cricut Maker, print and cut the details, and assembled the box. This is a simple box but it took me 2 days to finish. Waah! I wonder kung gaano katagal ginawa yung mga bonggang box. You can check my first-ever explosion box on Instagram Post for the video.


April 25, 2023

3D Be Happy Layered Craft

I just finished my Bee Happy Meal Menu so I thought that is only the project that I will make for “Red and Yellow” theme. But while I was browsing my files, I saw my 3D Happy Sunflower Shadow Box file which I bought a year ago. The sunflower is perfect for yellow colors and I can change the other elements to red color. 

At first, I was having second thoughts because this is a 17 layers project so I am not sure if I have enough cardstock for this so I ended up using smooth, glitter, and mirror cardstock so I can finish the project. 


I reduced the file to 5.4 inches just like my 3D Layered Sea Waves so it would fit my shadow box but after cutting a few layers, I am not getting a clean cut and I wasted a few pieces of paper. So I changed it back to its original size which is 8x8 inches. 


Since this is a 17 layers project, cutting each layer took a long time but I am glad I finished this project. This prompted me to buy a bigger shadow box so I can display my other layered craft like the Heaven’s Gate Shadow Box that I’ve made for All Soul’s Day. 

April 24, 2023

Save $300 for a Limited Time

I’ve got some BIG news! Styled Stock Society’s lifetime membership is back open and for a limited time you can save $300 - talk about a MAJOR deal. For just one single payment you get… 

All the stock photos and videos. 
All the graphic templates. 
All the caption templates. 
All the amazing bonus perks. 
FOR LIFE! 


Instead of paying for one-off template downloads or monthly photo subscriptions that add up over time, consider a one-time payment with LIFETIME access to all the marketing resources you need. 

This is an AMAZING value! Lifetime membership will be open again starting Tuesday, April 25th at 12am ET with a regular price of $900, BUT from 4/25 - 4/30 you can save $300 and become a lifetime member for just $600 (no code needed)! This lifetime membership offer expires on April 30th at 11:59 PM ET so, if you’re ready to invest in your brand (and save a TON of time on your marketing)l, join inside Styled Stock Society now! GET $300 OFF


April 23, 2023

Handmade Felt Food Toy

I am done with my Washi Tape Projects so my next goal is to make a craft project using “Red and Yellow” which are both Bee Happy Craft colors. When I read the theme, the first thing that pops into my head is the colors of McDonald’s so I decided to make a “Bee Happy Meal”. I created my own menu and I make sure that the food has a touch of yellow and red. I browsed Pinterest for ideas and templates.


Several years ago, my husband gifted me a sewing machine but I can count on my fingers the projects that I’ve made. And some of my projects like Tooth Pocket, Felt Stuffed Letters and Gingerbread Ornaments na mano-manong tahi so ang sakit sa kamay. So after listing my menu, I already knew that it will take me days to finish. 

It’s been years since the last time I made a felt project so I have very limited supplies but I really want to do this project so I pushed my plan. Thanks to online shopping, nadeliver naman agad yung felt cloth but while waiting for my order, I started cutting and sewing some of the food using my leftover supplies. So for this project, it is a combination of hard and felt cloth. 


My world stopped for few days, wala talaga ko ginawa kundi magtahi and because of that even we had no internet connection for one day, hindi ako nabored kasi busy ako sa pagtahi. So after three days of cutting and sewing, I finally finished my Bee Happy Meal Menu, I even made a gable box using cardstock. 


I felt satisfied after doing this project because it is so cute, parang gusto ko pa nga dagdagan ng nuggets and spaghetti. How I wish, I made this project when my son is still young but I am saving this for my future grandchildren, baka hindi na kaya ng powers ko magtahi sa panahon na yun. Hehehe! 
Klook.com