Showing posts with label sewing. Show all posts

April 23, 2023

Handmade Felt Food Toy

I am done with my Washi Tape Projects so my next goal is to make a craft project using “Red and Yellow” which are both Bee Happy Craft colors. When I read the theme, the first thing that pops into my head is the colors of McDonald’s so I decided to make a “Bee Happy Meal”. I created my own menu and I make sure that the food has a touch of yellow and red. I browsed Pinterest for ideas and templates.


Several years ago, my husband gifted me a sewing machine but I can count on my fingers the projects that I’ve made. And some of my projects like Tooth Pocket, Felt Stuffed Letters and Gingerbread Ornaments na mano-manong tahi so ang sakit sa kamay. So after listing my menu, I already knew that it will take me days to finish. 

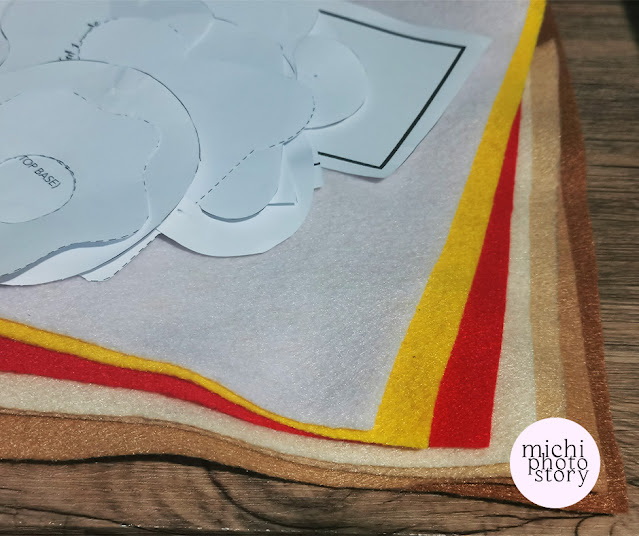
It’s been years since the last time I made a felt project so I have very limited supplies but I really want to do this project so I pushed my plan. Thanks to online shopping, nadeliver naman agad yung felt cloth but while waiting for my order, I started cutting and sewing some of the food using my leftover supplies. So for this project, it is a combination of hard and felt cloth. 


My world stopped for few days, wala talaga ko ginawa kundi magtahi and because of that even we had no internet connection for one day, hindi ako nabored kasi busy ako sa pagtahi. So after three days of cutting and sewing, I finally finished my Bee Happy Meal Menu, I even made a gable box using cardstock. 


I felt satisfied after doing this project because it is so cute, parang gusto ko pa nga dagdagan ng nuggets and spaghetti. How I wish, I made this project when my son is still young but I am saving this for my future grandchildren, baka hindi na kaya ng powers ko magtahi sa panahon na yun. Hehehe! 

August 25, 2018

The Top 5 Embroidery Tips for Beginners

1. Start with a small project 

Since you are a beginner, it is best to start with a small embroidery project that you can handle. This will help you to get some firsthand experience and familiarize with the skill. Taking on a huge project at once may discourage you midway as you may get exhausted and frustrated and give up due to minor setbacks. It is therefore advisable to start small and with time, advance on to more complex and large projects.

Read: The Day I Learned How to Sew


2. Don’t be afraid to ask for help 

As a beginner, embroidery is a new skill and art that requires patience and dedication to learn. Some people pick it up real fast while others take some time before they get the hang of it. If you find yourself stuck or having some trouble, do not get discouraged or give up. This is perfectly normal and you can always ask for help. You may do some research online, read a book on the same, or if you can, enroll in an embroidery class. All this will help you to perfect the skill and get better with time.

3. Buy the right equipment 

Embroidery requires that you have some materials first before you get started. For instance, you need a sewing machine, fabric, needles scissors, and so much more.  For instance, you may start with a small piece of cotton fabric and try doing a simple pattern of your choice onto the cotton as a test run. You may then try larger patterns on bigger fabrics after you have made some progress in learning. If you are on a budget, however, you may try a pattern on a piece such as an old tablecloth and see how it goes. Consider buying a machine that is within your budget. While doing some research on the best sewing machines, go straight to this page in order to get reviews on the best sewing machines and make the best choice.

4. Select the right needle 

In order to do a clean job in embroidery, ensure that you use the right needle. There are a number of factors to consider when selecting the needles. If you are using a light material such as linen, for instance, you need to select a needle that will easily penetrate the fabric without causing any friction or creating a frayed appearance on the fabric. Regularly do maintenance checks on your machines and on your needles so as to ensure that you replace any broken or damaged needles.

5. Select a well-lighted room 

Embroidery is a skill that requires not only our hands but our eyes as well. It is therefore of paramount importance that you choose a well-lighted space or environment to do the stitching and sewing. This may be a well-lighted room using either artificial light or natural light. Having enough light will help you to do your embroidery with ease as you will not have to strain your body or eyes due to poor lighting. Remember also to have a comfortable chair in order to take care of your back.

June 11, 2018

Rainy Weekend

Our summer vacation is about to end so I was cramming again. I bought my son’s uniform three weeks ago but after washing it, hindi ko na siya ginalaw. Hehehe! Iniisip ko kung ipapatahi ko ba o ako na lang magtatahi. I have sewing machine at home but I’m not confident with my sewing skills since konti pa lang nagagawa ko. I’m afraid na baka masira ko pa yung school pants ng anak ko, ang mahal pa naman ng uniform.

Read: The Day I Learned How to Sew 

But after watching YouTube videos nagkalakas na rin ko ng loob. It was funny because I forgot how to put thread in the bobbin and sewing machine, so aral ulit. When I was about to sew, I realized that my thread was insufficient for 4 school pants, so I told my husband I needed to go to the mall. Typhoon Domeng did not stop us, kelangan ko ng sinulid.

Jurassic World 


My husband and son were pleased because we could also watch a movie. My husband asked his parents if they wanted to watch a movie but they declined, may sarili silang lakad. So off we went to Southwoods Mall to watch Jurassic World. We knew that we were late for the 10:45AM first showing but my husband saw that there was an 11:10AM schedule so buzzer beater na naman kami. The movie fee is P300 (with popcorn and bottled water) so I guess, the rate depends on the movie or may price increase na. We just watched Avengers: Infinity War last month, P290 lang. You cannot choose the flavor of the popcorn, mas prefer ko yung popcorn last month, sour cream yata.

Hukad 


After watching the movie, I wanted to go home but my husband wanted to eat at Hukad. This branch was just opened last April 2018. He always visits Hukad whenever he is in Cebu and we also tried it during our trip. It was past 1PM so the restaurant was not full. Upon seated, we immediately browsed the menu and my husband said, wala daw yung inoorder niya.


I’m not sure if they have a different menu or we did not notice the dish on their menu. We just ordered Dinuguan P175+, Chicken Tinola P300+ and 3 Rice P65+. I was not able to take photos because when I went back to our table, busy na mag-ama ko sa pagkain so ito na lang natira. Hehehe!


The food was just okay for us, I was not happy with the Unli Rice for P65 because lugi kami dito. I hope they have an option na per cup lang. My son and I were not able to finish 1 cup of rice nga e. But if your family loves unlimited rice, then sulit itong Hukad sa inyo.

The last time we tried Hukad was two years ago pa, so I was surprised with the price increase or iba presyo sa Luzon? Well, the price is budget-friendly compared to other restaurants kaso nasa utak ko lang yung presyo sa Cebu. Hehehe!

Read: Hukad by Goldern Cowrie 

Back to Schook Preparation 

When we got home, I started sewing my son’s school pants and I’m so proud of myself na nagawa ko. After that, I was thinking kung tahiin ko na rin kaya mga pants ko ng di na ko tupi ng tupi. Alam niyo naman, petite lang lola niyo, hehehe!


Then I printed labels for my son’s books and school supplies. This is one thing that I don’t like in their school, they only give section few days before the first day of school. Now, I’m waiting for the list of subject teachers so I can print labels for notebooks naman.

January 25, 2016

DIY Tooth Pocket

Last month my son visited the pedia-dentist, she advised my son to wiggle the milk teeth in front of his permanent teeth. Unlike other kids, my son’s teeth were so intact na parang ayaw ng umalis. The two permanent teeth were out already but the baby teeth are still there so we have no choice but to remove it to give way to the permanent one. 


A few weeks ago, my son told me that his tooth is already moving so I kept on reminding him to wiggle the tooth so we don’t need to go to the dentist anymore. But of course, he’s so scared of the pain. Though he doesn’t believe in Tooth Fairy, I told him I will be his tooth fairy so I sew Tooth Pockets where he will put his tooth and I printed Tooth Record and Tooth Fairy Receipt. Check my Pinterest to know the source of free printables. 


Sewing this tooth pocket is so easy if you don’t want to sew you can use glue. My son was so happy when he saw these tooth pockets. 


January 16, 2016 


Finally, after several days, he agreed to remove his tooth. My husband showed him a video where the tooth was tied in Nerf Dart. We tried it but the tooth was still there so my husband just pulled the tooth using the thread. 


The first tooth was out so I was able to save P1,800 for this. I was praying that the other tooth will fall out soon so no more trip to the dentist. But unfortunately, ayaw niya umalis. It was moving pero matigas pa siya para bunutin. 

January 23, 2016 

Simple Tooth Extraction by Pediatric Dentist

Last Saturday, we went to the dentist. We’re running late already because my husband informed me that our schedule is 1PM. Waah! According to my calendar, our schedule is still 4PM, binago pala nila and my husband did not inform me. 

The staff informed him the day before but he forgot to inform me because he was in Brunei working and went straight to the airport to go back to the Philippines. Anyway, we’re 10 minutes late and waited for another 5 minutes so they can prepare the room. 


The pedia-dentist asked me kung bubunutin pa ba, mga two weeks matatanggal na daw yung tooth. I asked my son kung masakit na ba yung tooth and he said yes so the doctor said, we need to remove it na. 


So she explained to my son step by step, the doctor applied anesthesia then after two minutes, injection naman ng anesthesia. I was holding my son’s hand to let him know that I’m just there. 

He cried during the process, sino ba naman ang di masasaktan di ba. Pulling the tooth was easy as 1, 2, 3, matagal pa yung sa anesthesia. The staff gave him yoyo and a tooth holder where they placed his tooth.


I was already paying the bill when his dad came, ganun kadali lang and mas matagal pa naghanap ng parking ang daddy niya. My son experienced two ways of removing tooth, so I asked him kung sino mas type niya, si Daddy ba o si dentist. Si Daddy na lang daw, hehehe! Sana nga, so I can save P1,800. 


I know that I can still save money if I will visit other dental clinics but I don’t want to risk the experience at baka matrauma sa dentist. 

January 11, 2016

DIY Dinosaur Plush Toy

It is not a secret here that my son loves dinosaurs so last year he asked me to make a dino plush toy. I said yes but I was busy and lazy last year so it really took me a long time to fulfill my promise. 

My son asked before we watched Jurassic World. We’ve been to Dinosaurs Island and nagshowing na lang ang The Good Dinosaurs hindi ko pa rin nagagawa. #lazymom 

The last time I sew was July 2015, I sew one dozen of pillow cases and after that I forgot to make any sewing project so yesterday, I push myself to sew again. My husband was teasing me when he saw me preparing my sewing machine. 

Hubby: Gumagana pa ba yan? Baka kinakalawang na. hehehe!

My son saw me sewing the dinosaur and he asked me, 

Ethan: Mommy, you want to be like Wowa?
Me: Why? 
Ethan: because you’re making stuffed toy. 

I smiled because he remembered the handmade doll that his Wowa made for him, you can check it here and here.  

Anyway, here are the steps of DIY Dino Plush Toy 


Cut the pattern and fabric. 


Pin, sew the fabric (opposite side) and leave a small opening. 


Turn the fabric inside out and put the fiberfill inside. 

Then hand sew the opening. Glue the eyes. 


You can do this by hand but I wanted to use the sewing machine, hehehe! I realized that it is not easy to make a small plush toy and marami pa curves so medyo matagal. Not a perfect dinosaur plush toy but my son was very happy and he even said. “Galing ka mommy!

But after few hours.

Ethan: Mommy, this dinosaur cannot stand, it needs four legs. 

Waah!

Ethan! Mommy, you need to put ribbon at the back (spikes)

Okay, so I need to improve this dino plush toy pag sinipag ulit ako. hehehe!

May 26, 2015

DIY Pillowcase

I’ve been too preoccupied these past few months so I stopped practicing sewing. I did not expect that because I planned to do my pinned sewing projects in Pinterest this summer vacation but because of the heat, I feel so lazy to do it. 

Last Sunday, I push myself to sew pillow case because I bought two king size pillows. I bought these pillows after watching “Home”  movie last April 1. We can’t use the pillow because we don’t have king size pillow case 20x36.


I tried to check different malls but I can’t find king size pillow cases so I gave up and decided to make my own pillow case. Thank God that I still have enough fabric for that, though the fabric doesn’t matches our bed sheet.


According to my cheat sheet, you need 1 1/4 yard of fabric and cut it in 41 x 41 inches. Sewing pillow case is one of the easiest sewing projects for beginners. As in super easy because you just need to sew the top edge, one side raw edge and bottom. You can do this in 10 to 15 minutes. 

And because I missed my sewing machine, I made throw pillow cases too. This is an easy project too, you just need to measure your pillow, mine is 15 x 15 inches. Then I cut my fabric 16 x 36 inches. 


I finished 2 king size pillow cases and 4 throw pillow cases and I’m planning to make more pillow cases. I just need to buy fabric that will match our bed sheets. 


Sorry, no step by step picture and guide at kinacareer ko ang pagtahi.

February 26, 2015

DIY Kid’s Tool Belt

Last Sunday, I noticed that my son loves putting his toys in between his shorts or pajamas and body so I searched for pattern and tutorial on how to make kid’s tool belt. 


I was happy that I’ve made it though the stitches in one pocket is not straight, hehehe! But I’m planning to make a bigger one because my son tends to put so many stuff inside so he needs more pocket.


Click here for the pattern and tutorial.

February 16, 2015

How Did You Spend Your Valentine’s Day?

Last week I was planning where are we going to celebrate our Valentine’s day because that it also our 12 years anniversary as a couple. But none of my lists materialized. I was thinking to join my husband business trip in Bacolod because we have no classes for 4 days due to “Educational Congress” but since the trip was just overnight it is not practical to spend for plane ticket. 


Day before Valentine’s day, I sew drawstring pouch again, this will serve as a treat bag or envelope where my son will put his Valentine’s card. For the last few years, we’ve been receiving cards such as Mother’s Day, Christmas card and Valentine’s card because that is part of my son’s school/summer class activity but since we have no classes, I know that we won’t be receiving any card so I told my son to make card for his daddy. 


After dinner, we painted the drawstring pouch and my son said “Mommy, faster! Daddy is coming home”. Hehehe But my husband texted me that his flight was delayed so I know we have more time to prepare. 


I printed a card with funny messages and I had a hard time choosing one. In the end, I chose this message “There's nobody I'd rather lay in bed and look at my phone with” It is funny but true, most of the time we will lie in bed side by side and our focus is on our phones. So I told my husband that we should change that.


I also printed this love quest survey and favorite questionnaire, like I said, we’re celebrating our 12 years and many things have changed so it is nice to get to know each other again. 


I waited for my husband’s pasalubong/Valentine’s gift and he came past 12AM, just in time for Valentine’s Day so we ate Calea blueberry cheesecake before going to bed. My husband knew that I don’t like flowers so he already stopped giving me flowers. 


And because napuyat ako, I was really lazy to go out on Valentine’s Day. My husband wanted to go to Nuvali for the Nightsky Cinema but I chose to stay at home and rest. 


There’s nothing special on our Valentine’s day but one thing I like in this celebration is we “Spend less and love more”. We have simple celebration and gift but it is also nice to know more about my husband. I enjoyed reading the love quest survey. 


Click to get the printables. 


Funny Valentine’s Card

Valentine’s Card 
Love Quest Survey/Questionnaire 
Be my Valentine Card

February 11, 2015

DIY Drawstring Bag and Pouch

After I finished hand sewing my felt stuffed letters, I decided to make a drawstring pouch where I can put all the letters.


I searched for different tutorials and I saw a 3 minute video on how to make a drawstring pouch which I followed. Since I’m just using a plain white cloth, I tried to put some design by placing our initials. 


First time to try applique and it is not easy to sew along the edge but still I was glad with the result. 


And because of that I watched the Bag Making Basics Class that I enrolled online and printed the step by step guide. These are the finished products.


I like this drawstring bag because it has a lining inside so it has a “clean look”. 


Lastly, I watched the free tutorial video from Brother sewing machine. This project wasn’t easy because I have to do zigzag stitch, straight stitch and button hole. So it took me a long time trying to figure out how can I do button hole. Thank God for the sewing manual. 


I’ve made six but I need to buy more ribbon or string for the remaining drawstring pouches.


Among the three, my favorite is the second drawstring bag. If you notice, I’m still using my fabric scrap from pajama

February 03, 2015

DIY Felt Stuffed Letters

I’ve been meaning to make crafts out of felt cloth but the problem is I don’t know where to buy felt cloth. #boo For years, I’ve been buying fabric for my son’s costume but those stores don’t sell felt cloth. Last month, I asked a blogger friend where she buys felt cloth and she told me I could try at Market Market and Office Warehouse. So when I visited Festival Mall, I went to Office Warehouse and I found felt sheets. Waah! Dun lang pala kita makikita. 


Finally I can do felt crafts, I started with felt stuffed letters first since I feel that it is so easy to make. I printed pattern and trace it on felt cloth. 


Then I started sewing and stuffing. 


Well, this is not easy pala. It took me four hours just to finish five letters.


After I finished my son’s name. He was asking for his second name. Waah! But I should be happy because I know that he likes it so I cut all the letters of his name including surname. Then the following day, I finished everything and maybe because I”m used to it, madali na lang. Imagine I finished 13 letters and wala pa 4 hours. Hehehe! I sew drawstring bag too for the felt stuffed letters. 


I gave it to my son and he started using it and then he said, “mommy, where’s the letter C?” Oh no, he was asking for his middle initial. Need talaga complete, so I made letter C and I was praying hard that he won’t ask for “period”. 

I’m planning to complete the remaining alphabet letters because this is nice way to teach him spelling. Nice gift too for toddlers.

January 28, 2015

DIY Business Card Holder

I decided to make a business card holder before the class resumes because I know that I’ll be busy again tutoring my son. Business card holder is my second sewing project after I’ve made the pajamaI wanted to use the fabric scrap so it won’t put to waste. 


I watched You Tube videos for tutorial and it looks so easy. It is a five minute project but of course it took me forever to finish mine. Hehehe! My first try wasn’t successful because my calling card doesn’t fit. I tried it again and I did it. 


But I wasn’t satisfied yet so I searched for another tutorial and I found this site. I checked the step by step and I practice more. 


I finished four business card holder and I gave it to my friends. I’m now using the card holder for my calling card. I will make more if I have new fabric.


Klook.com