Showing posts with label handmade. Show all posts

December 02, 2024

Handmade Holiday Craft Meet with KM and Judy

I was not feeling well for the last several days and these handmade gift tags were my final project. After I made this, I got sick so I stopped crafting. I am wondering why I got sick when I was just at home, wala naman nanghawa sa akin. I still have a cough and colds and hopefully mawala na rin in the next few days.

Anyway, last month I attended the Handmade Holiday Craft Meet with KM and Judy PHP799. I won an Exclusive Event Pass last year but I haven’t used it yet kasi ang layo ng Bee Happy Craft Store sa amin so kapag may event, malabo makapunta. So when I saw there was an Online Option, I took advantage of it. I only paid for the shipping fee so they could deliver my crafting kit. 


Here are the crafting supplies and tools that I received. 


Cardstock for handmade bag, card and gift tags 
Lindy’s Magical Powder (Mad Hatter) sampler 
Aleene’s Glue 
Brush 
Mintay Chips 
Foam Tape 
Die-cut sentiments 

I just watched the demo and waited for the replay video. Hindi ko kayang magcraft along when I learned na nakakstain yung Lindy’s Magical Powder. It was my first time using it and sobrang messy pala niya gamitin, ang dami ko wipes na naubos, kakapunas ng work area ko. Kasi kahit may glass mat na ko, may lumalagpas pa rin kapag nagspray ako. Good thing that my craft area is beside our kitchen so madaling maghugas. It was messy but fun. 


These are my finished handmade gift tags using the techniques I learned and the craft supplies inside my kit. And because of this, natetempt na akong icheck-out yung Lindy’s Magical Powder sa shopping cart ko.

January 16, 2024

Heart Shape Treat Box

Every Valentine’s Day, I always give chocolates to my son or something sweet. Most of the time, I will just add a card or gift tag because the majority of the chocolates have their own packaging. But this year, I made an effort to make my own packaging using the Heart Shape Box that I found on Cricut Design Space. 

I have different chocolates at home so I tested two sizes. At first, I changed the size so I could maximize the paper, I could add several pieces of Kisses Chocolates to that box. Then I tried the original design and the Mini Ritter Sport chocolates fit perfectly. So in the end, I chose the latter. 

But instead of using smooth or textured cardstock, I decided to print my own paper using the Vintage Handwritten Letters Overlays so it would look like a Love Letter Box. I placed the designs on US Letter Sized Cardstock and printed three pieces of paper. Then I used the paper to cut the Heart Shape Box. 


This is an easy project, just score, cut, and assemble.


January 15, 2024

October Craft Projects

It is time to clean my phone gallery again so I am sharing the craft projects that I did last October. 

O-fish-ally Sixty Card 


I made this O-fish-ally Sixty Card for someone who loves fishing. I used the Layered Fish Paper Craft SVG of The Bearded Housewife. I reduced the design so it would fit my 5x7-inch card. I used Distress Oxide for the background. Lastly for the title, a combination of white cardstock and premium shimmer vinyl. 

“Birthday COD message is I would like to take this oppor-TUNA-ty to greet you Happy Birthday. You are o-FISH-ally sixty and may all your birthday FISHES come true” 

Gnome Teacher Easel Cards 


I made these Gnome Teacher Easel Cards for my son’s teachers using Craft with Sarah Teacher Gnomes design. I also submitted this as my entry for Teacher’s Day in one of the groups that I joined and I was fortunate to win the prize. 

Frankenstein Monster and 3D Ghost


The Frankenstein Monster and 3D Ghost are part of my Halloween Craft Projects that I shared before. Both files are designed by Digital Gems.

3D Pumpkin Patch and 3D Warrior 


I cut 3D Pumpkin Patch and 3D Warrior SVG files, both files are designed by My 3D SVG. I was not happy with the result, but I still assembled the design. I plan to repeat these two projects especially the 3D Warrior and hopefully, I can get a clean cut. 

Sugar Skull 


This Sugar Skull was my entry for Dia de Muertos, I found the sugar skull design on Cricut Design Space. This is the last Halloween Craft Project that I did. 

Australia Layered Craft 


This is my last-minute project before we went to Sydney Australia. I was supposed to use this Australia Kangaroo SVG for our t-shirts but because we didn’t have an internet connection for almost a week, I was not able to do the project. So I just made a layered paper craft and I brought this to Sydney. I also submitted this craft and luckily I won a PHP300 voucher (random entry).

April 23, 2023

Handmade Felt Food Toy

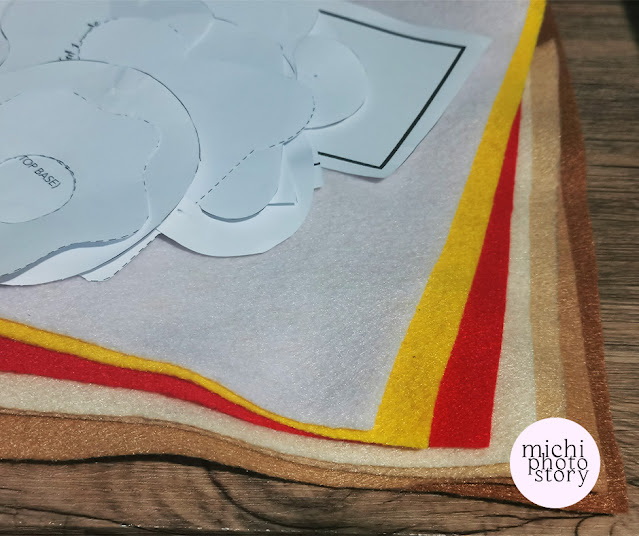
I am done with my Washi Tape Projects so my next goal is to make a craft project using “Red and Yellow” which are both Bee Happy Craft colors. When I read the theme, the first thing that pops into my head is the colors of McDonald’s so I decided to make a “Bee Happy Meal”. I created my own menu and I make sure that the food has a touch of yellow and red. I browsed Pinterest for ideas and templates.


Several years ago, my husband gifted me a sewing machine but I can count on my fingers the projects that I’ve made. And some of my projects like Tooth Pocket, Felt Stuffed Letters and Gingerbread Ornaments na mano-manong tahi so ang sakit sa kamay. So after listing my menu, I already knew that it will take me days to finish. 

It’s been years since the last time I made a felt project so I have very limited supplies but I really want to do this project so I pushed my plan. Thanks to online shopping, nadeliver naman agad yung felt cloth but while waiting for my order, I started cutting and sewing some of the food using my leftover supplies. So for this project, it is a combination of hard and felt cloth. 


My world stopped for few days, wala talaga ko ginawa kundi magtahi and because of that even we had no internet connection for one day, hindi ako nabored kasi busy ako sa pagtahi. So after three days of cutting and sewing, I finally finished my Bee Happy Meal Menu, I even made a gable box using cardstock. 


I felt satisfied after doing this project because it is so cute, parang gusto ko pa nga dagdagan ng nuggets and spaghetti. How I wish, I made this project when my son is still young but I am saving this for my future grandchildren, baka hindi na kaya ng powers ko magtahi sa panahon na yun. Hehehe! 

July 18, 2019

The Day I Learned How to Crochet

My mom is an expert when it comes to crochet, so we always have potholder, handmade doll, and other crochet projects. I always see her crocheting since I was a kid but in my mind, this is not something for me. It looks so complicated so I have no plans of trying it.

But during our summer vacation in Norway, out of the blue, I asked my mom to teach me how to crochet. Of course, she taught me the basic stitches which are single crochet and slip stitch. Then my son told me that his classmate knows how to make a bracelet. Waah! Mas nachallenge ako, if a 10-year old girl can do this, mas kaya ko ito. So I told my son, I can also make a bracelet for you so I made a simple chain bracelet. Lol.

1. Cellphone Holder 

But of course, I challenged myself to make my first crochet project. I don’t want a potholder because I have a lot of potholders from my mom so I make a cellphone holder for my son. Every day, I crochet several rows and I realized that it is not easy to crochet kasi masakit sa kamay. So now, I will never look at a crochet potholder the same way again. I know that it takes time, effort, and love just to finish a crochet project.


After a week, I was able to finish my crochet cellphone holder. I know some people can do this in one sitting but it took me a long time because there are times that I have to undo it and repeat because my project was not straight. But I’m proud of my first project and I’m happy because my son was using it. He can put his cellphone and power bank inside the cellphone holder.

2. Handmade Dolls 

My mom always makes a handmade doll, if you are a regular reader of this blog, you've already seen some of her works, but you if you miss it, check it here and here. I also took some photos of her handmade dolls. My mom made these for displays, gift for family or friends and sometimes she sells it too.


Looking at these handmade dolls, feeling ko hindi kaya ng power ko and I’m not sure if I can finish it during our summer vacation. But of course, nothing is impossible when you believe. So for my second project, I will make a handmade doll so I can give this to my husband on his birthday.


My mom has a lot of crochet books and magazines so I just choose the pattern that I like. The pattern was in Norwegian language so my mom assisted and guided me until I finished the project. My first handmade doll was not perfect because I can only make square or rectangle, pagpabilog na medyo mahirap pa sa akin. But after finishing my first handmade doll, I decided to repeat the project para may kapartner.


I just crochet part by part of the doll and after that, I joined them. I’m so happy that I finished these handmade dolls in one month. The blue handmade doll looks good na compared to my first one. Sometimes, I still can’t believe na gawa ko ito. These were my birthday gift to my husband and he was surprised when he opened his gift last month. He knew that I have crochet project pero hindi niya ineexpect na ito yung ginagawa ko. I will make another one if I have the yarn para family of three na.
 

Next time, I will share the crochet projects that I’ve made after my summer vacation, made in the Philippines na. Hehehe! How I wish, dati ko pa inumpisahan matuto.


“Never stop learning; for when we stop learning we stop growing.” - Loyal Jack Hewman

December 19, 2016

How to Make Polymer Clay Christmas Ornaments

I don’t change our Christmas tree theme every year because ornaments and decorations are expensive and we live in a small house so changing decors every year will not help us. Where will I store all the decors after Christmas?

The less you have and do, the more you will FREE 

So for the last few years, I just added one or more ornaments and reuse the old decors. If there is stuff that I won’t use anymore, I give it away. For the last 3 years, we’ve been making handmade decorations on our Christmas tree. So far, we made Christmas angels, paper ornaments, salt dough ornaments and gingerbread ornaments. 


It is really nice to see those DIY ornaments every year because it is not just a decor, we made it and there is a story behind it. It is a good way of keeping our memories alive. 


Last Saturday, we made another Christmas Ornaments using Polymer Clay. It is our Day 17 Advent Calendar activity. We’ve made Salt Dough Ornaments last year but it did not last so this year I decided to use polymer clay. 


I bought polymer clay last month at National Bookstore but there are only two available colors, green and yellow and I chose green. I only bought one clay so we can try it, the polymer is not cheap too, P95. For the tools, we use my son’s clay tools that I bought in Daiso Japan, old Christmas tree Cookie Cutter, and Oven Toaster. 


Since it will be our first time to use polymer clay, we just chose an easy design which is Christmas Tree and we put our family fingerprint to add a personal touch. 


For baking time, I just refer to the instructions at the back of the polymer clay packaging. We use sharpie pens to color the fingerprint.

We’re so happy with our first polymer clay Christmas ornaments. We will definitely do this again, more practice pa. Aside from NBS, do you know where I can buy polymer clay here in the Philippines?   

Update: December 2017


We did not do any Advent Calendar activity this year. Last year, we made ornaments using polymer clay so this year, my son wanted to make a new ornament. So when I visited a bookstore, I bought red polymer clay. He was bugging me to do it right away but I told him, sa Christmas break na lang so he has something to do. 

So during the holiday break, we made new polymer clay ornaments. We did not hang this anymore kasi few days nalang Christmas na. hehehe! But I will include this in our Christmas tree next year. I made the wreath and watermelon. 

December 12, 2016

DIY Gingerbread Ornaments

Ever since I changed my Christmas tree theme last 2012, I did not change it anymore. I’m very much satisfied with our Christmas ornaments so I don’t have any reasons not to reuse it. I just buy or make our own Christmas ornaments to add more decorations to our Christmas tree. 


Read: DIY Christmas Angel Ornaments

DIY Paper Christmas Ornaments

Last year we made salt dough ornaments but they did not last, maybe because of the moisture or I did not store them properly so I threw them away. Anyway, I have a brown felt cloth at home na pakalat-kalat lang so I decided to make another ornament. Of course, I asked permission from my son because he owns the felt cloth. He got it from one of his activities at Edsa Shangri-la Cubs Trainings


Read: DIY Salt Dough Ornaments


My son allowed me to use it so I was able to make gingerbread ornaments. I did not buy any materials so I just use whatever I see at our home. I looked for gingerbread pattern, printed and traced it on the brown felt cloth. 


From the scrap felt cloth, I was able to make four gingerbreads then I patiently sewed them. My son helped me in stuffing the ornaments and I decorated them.


We’re so happy with our handmade gingerbread ornaments and it is now hanging on our Christmas tree.  Indeed, you can save money on upcycling stuff at home. 


Felt cloth (freebies from EDSA Shang)

Ribbon (Red Ribbon)

Read: DIY Christmas Wreath

March 20, 2013

Handmade Doll

My mom discovered her creativity skill when she went to Norway and one of her hobbies is making handmade doll. She also sells handmade dolls in Norway. Part of her pasalubong to her grandchildren is handmade doll. 

My son loves this doll and he even named it “Kaka”. I don’t know where he got the name but after one day, I’ve got the answer to my question. “Kaka” for kakatayin. Look what happened to this doll. #poordoll


Klook.com